
I Found a Stranger’s Phone. I Had No Way In. So, I Built One.
A real story about mobile forensics, FRP bypass, chipset research, and passive OSINT, all in service of getting a phone back to its owner.
A real story about mobile forensics, FRP bypass, chipset research, and passive OSINT, all in service of getting a phone back to its owner.
⚠️ Disclaimer: Everything described in this article was performed on a found device with the sole intent of identifying and contacting its owner. All techniques are shared for educational purposes only. Do not attempt these methods on devices you don’t own or have explicit authorization to examine.
It started with a phone on the floor of a mall.
No one around it. No one is looking for it. Just a Samsung Galaxy A14 sitting there, screen locked, completely unresponsive to anything except a PIN prompt.
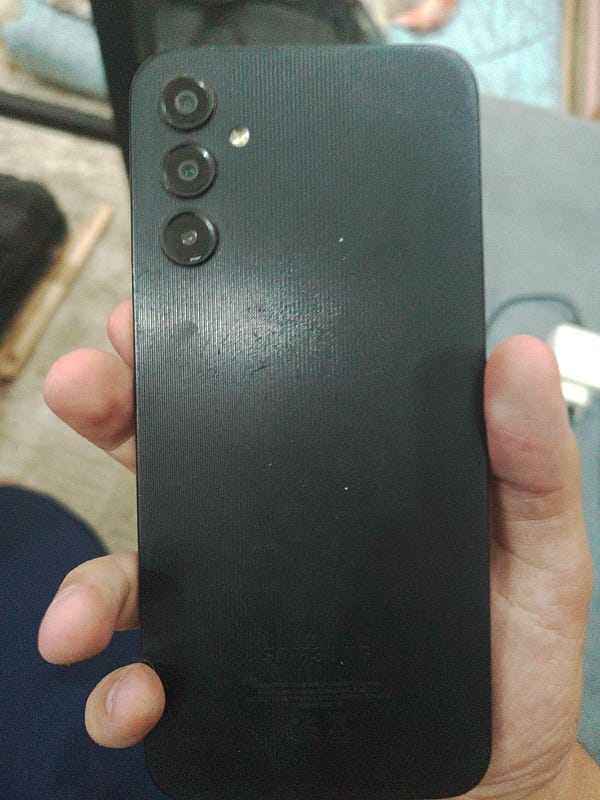
My first instinct wasn’t to hand it in somewhere and forget about it. My instinct was: I work in DFIR. I should be able to figure out who this belongs to. So I picked it up and started thinking.
The First Wall: USB Debugging Is Off
The obvious move for anyone with a forensics background is to plug the phone in and see what ADB gives you. But that requires USB Debugging to be enabled in Developer Options, and on a device that’s PIN-locked, you can’t access Developer Options. The phone shows up as a generic storage device, and every forensic tool you try either fails silently or throws a “device not authorized” error.
No ADB. No shell access. No MTP beyond the basics. The phone was a brick from a software perspective.
Plan A: Factory Reset + Data Carving
When live access is blocked, you fall back on the next thing: wipe it and recover what you can.
The logic was simple. If I factory reset the phone, it boots into setup mode. At that point, I can enable USB Debugging during the initial setup flow, connect the device, and use data carving tools to recover deleted artifacts, photos, contacts, call logs, and anything that survived the wipe in unallocated space. Even a single contact name or photo with a face is enough to start an OSINT trace.
So I held Volume Down + Power, entered Recovery Mode, and wiped the device.
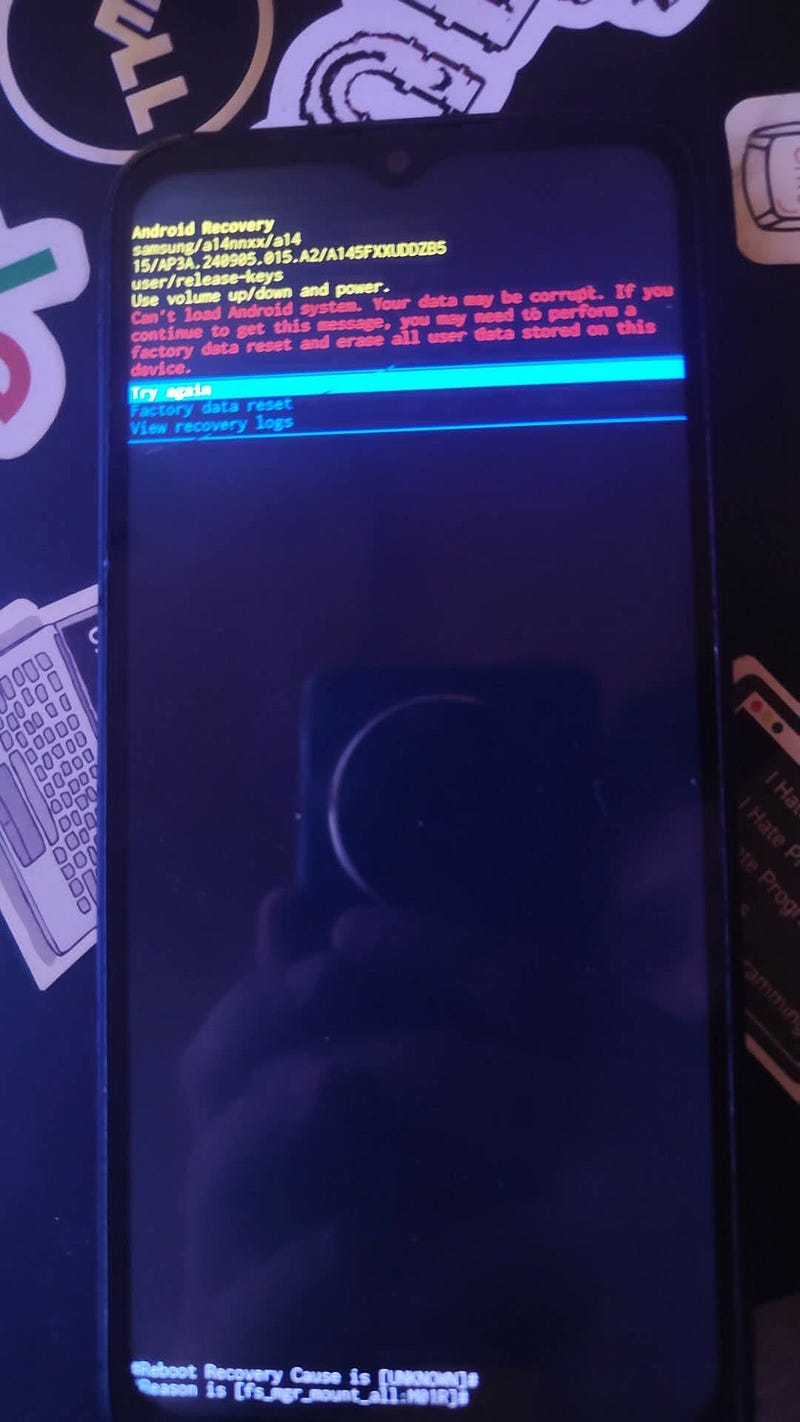
The phone rebooted. The setup wizard appeared. I pressed Start.
And then I hit the second wall.
The FRP Problem Nobody Warns You About
FRP (Factory Reset Protection) is a Google security feature that activates the moment you factory reset a device linked to a Google account. After the reset, the phone refuses to complete setup unless you sign in with the exact Google account previously associated with the device.
From Google’s perspective, the logic is sound: if someone steals your phone and wipes it, they still can’t use it without your credentials. It’s a good feature. It just destroyed my plan.
I connected the phone to SamFw Tool 5.4 to check the state:
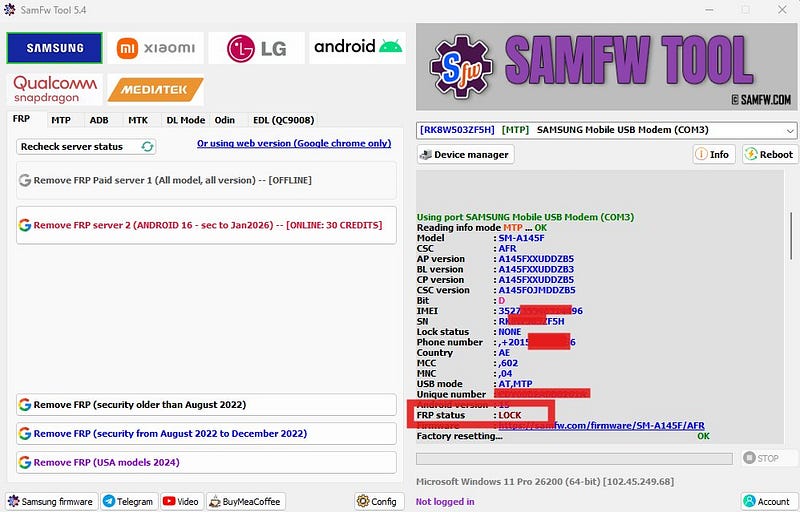
FRP status: LOCK. The phone was going nowhere.
The Research Phase: What Chipset Is This Thing Running?
This is where things slowed down and got methodical.
I spent time going through the usual routes: SamFw’s built-in FRP removal options, various Odin3-based firmware-flashing approaches, and community methods circulating for the A14 series. Some required paid server credits. Some were Android version-specific and didn’t apply here. Some simply didn’t work.
After hitting dead ends, I shifted my approach. Instead of looking for a generic “Samsung FRP bypass”, I started asking a more specific question: what chipset is actually in this phone?
Why does that matter? FRP bypass methods, especially through forensic tools, are chipset-specific. The same model number can ship with completely different silicon depending on the region and production batch, and the tooling that works for one variant will do nothing for the other.
A quick search confirmed the split:
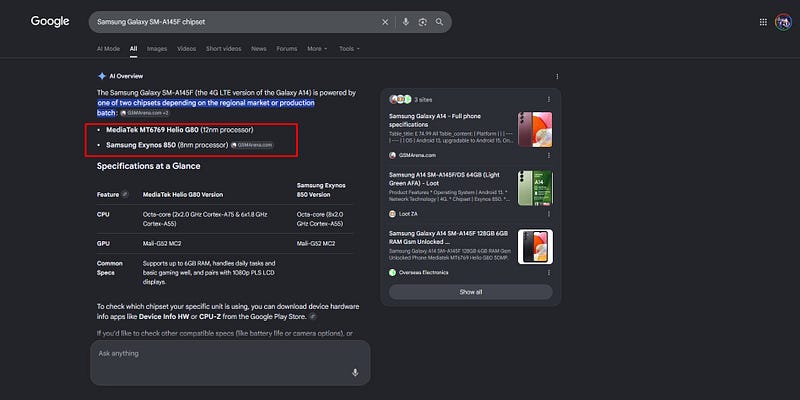
Samsung Galaxy SM-A145F ships with either MediaTek MT6769 Helio G80 or Samsung Exynos 850, depending on the regional market.
To cross-verify, I pulled the full device specs from Phonedb:
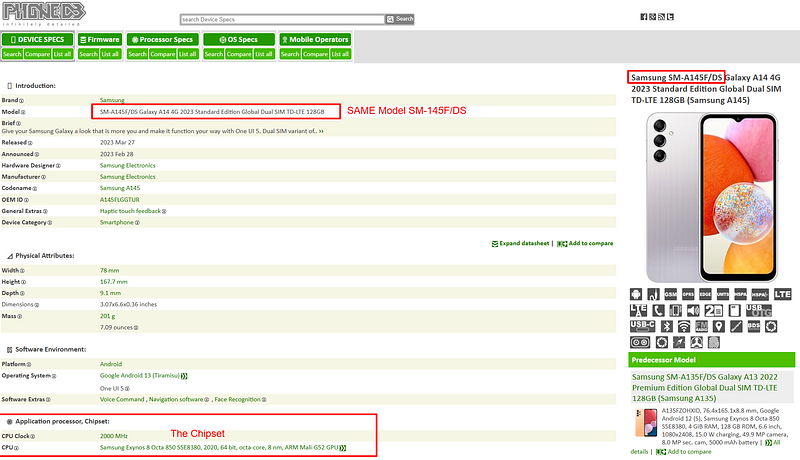
Same model. Same variant. Samsung Exynos 850: confirmed.
Now the real question was: what can we actually do with an Exynos on a locked device?
Confirming the Chipset via Download Mode
To check which variant I had, I entered Download Mode: Power off the device, then hold Volume Down + Volume Up + plug in USB simultaneously.
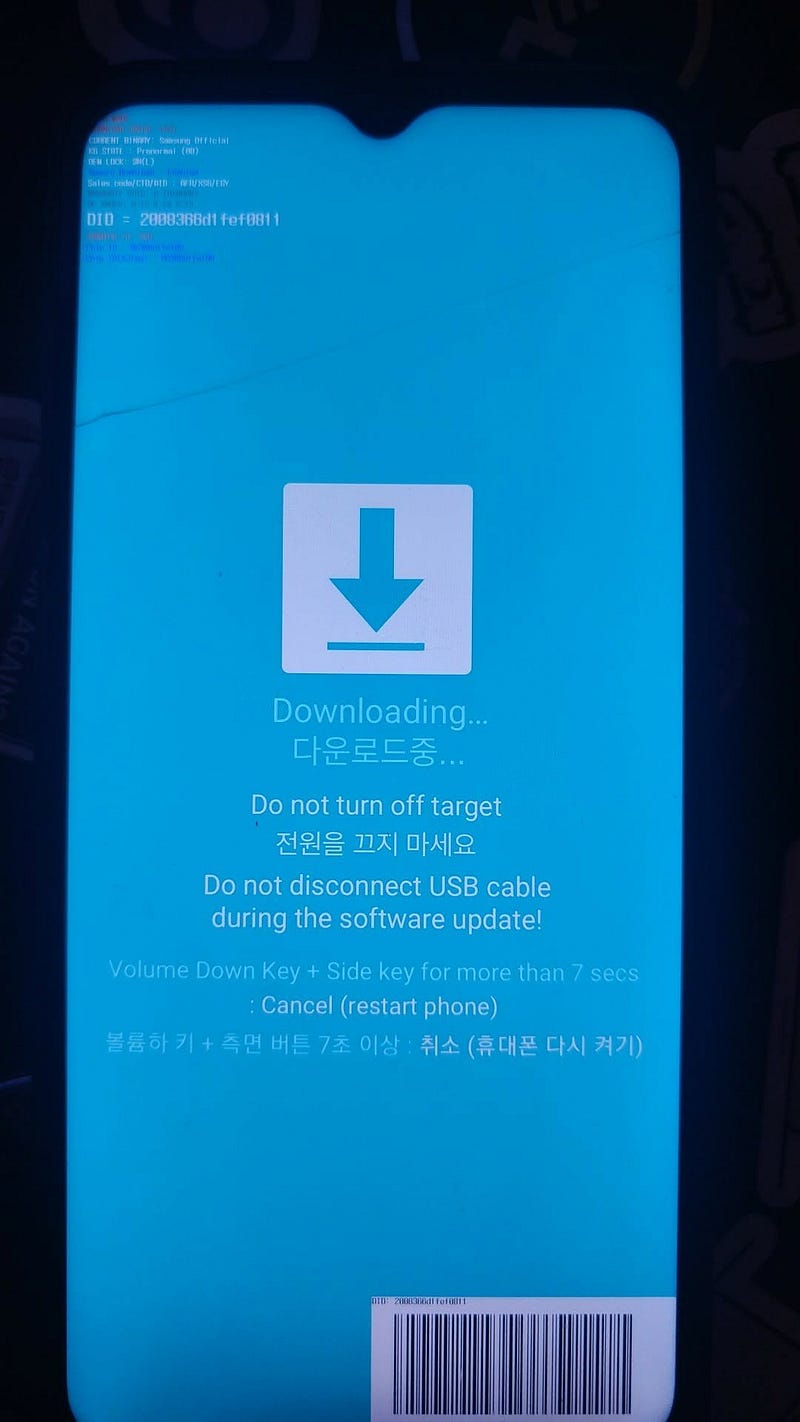
The bootloader screen showed the device binary, OEM lock status, and hardware identifiers. The chipset was confirmed to be the Samsung Exynos 850.
That one confirmation changed everything.
MOBILedit Forensic Ultra: The Exynos Decrypt Path
MOBILedit Forensic Ultra has a specific extraction method for Exynos devices called “Boot recovery and decrypt”. The process works by booting a custom recovery on the device to obtain root-level access, then decrypting the device storage at the partition level to bypass FRP, since FRP operates below the Android OS layer.
The workflow inside MOBILedit:
Step 1: Choose model:
SM-A145F wasn’t in the list.
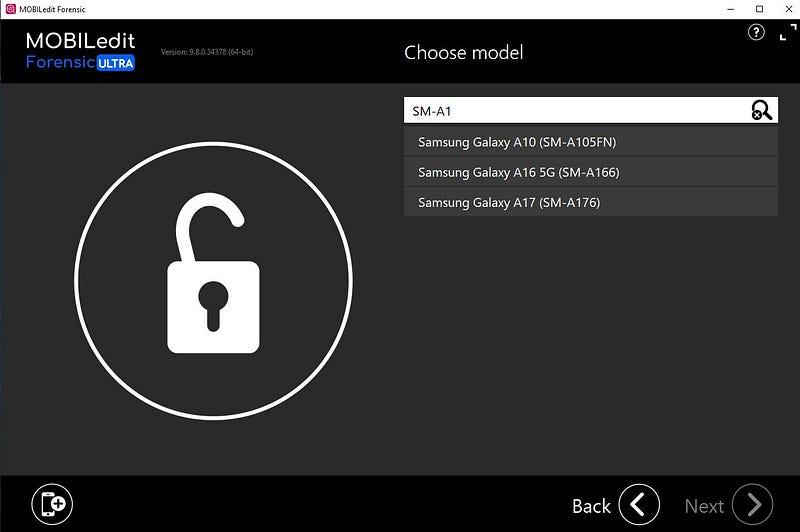
MOBILedit didn’t have this specific variant. So instead of searching by model, I pivoted; if the tool knows the chipset, that’s enough. The chipset is what drives the extraction method anyway, not the marketing name on the box.
Step 2: Choose a chipset:
Samsung Exynos 850, confirmed.
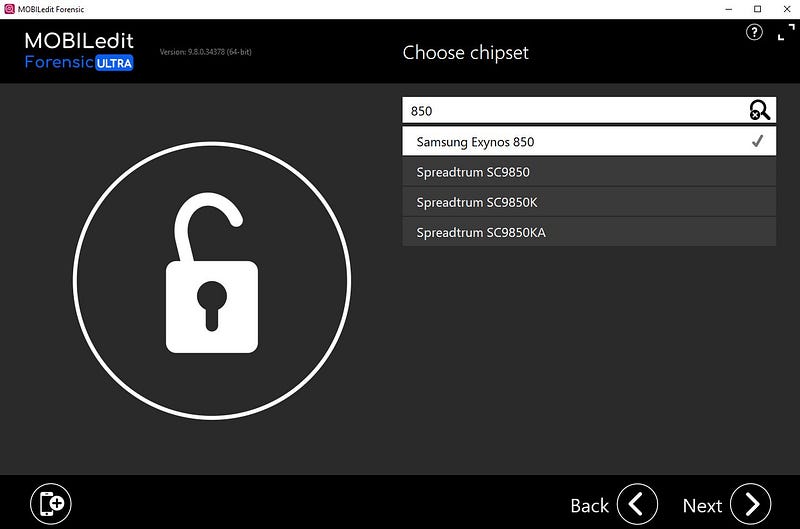
This is the critical selection; a wrong chipset here means the recovery boot will fail or brick the process entirely.
Step 3: Choose action:
“Boot recovery and decrypt”, the description says it all: custom recovery, root access, partition-level decryption.
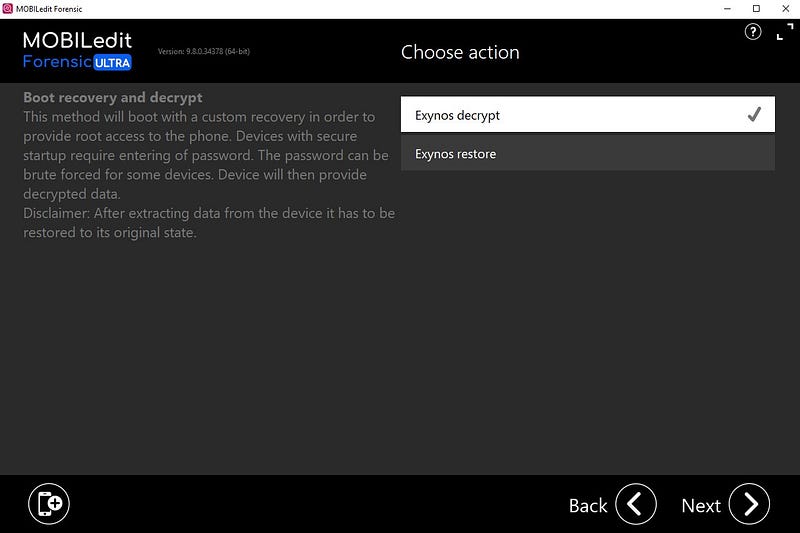
Devices with secure startup may need password brute force; this one didn’t.
I hit Next and watched the output:
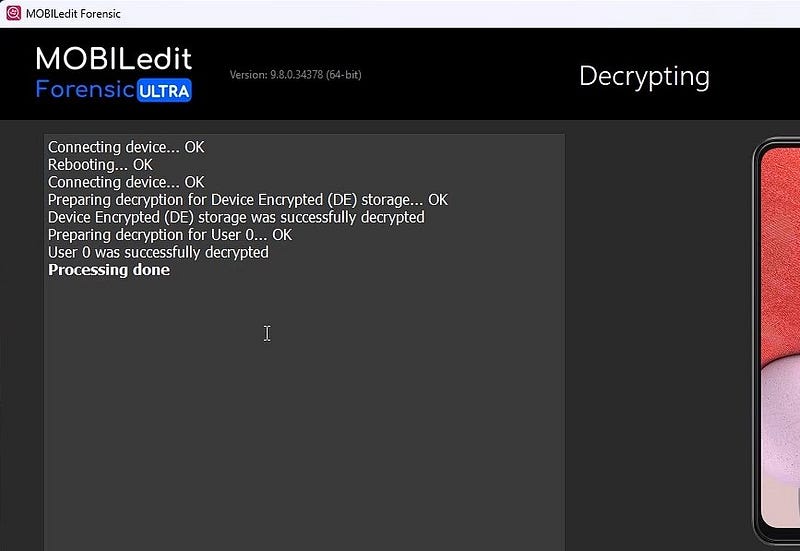
The phone rebooted to the Welcome screen.
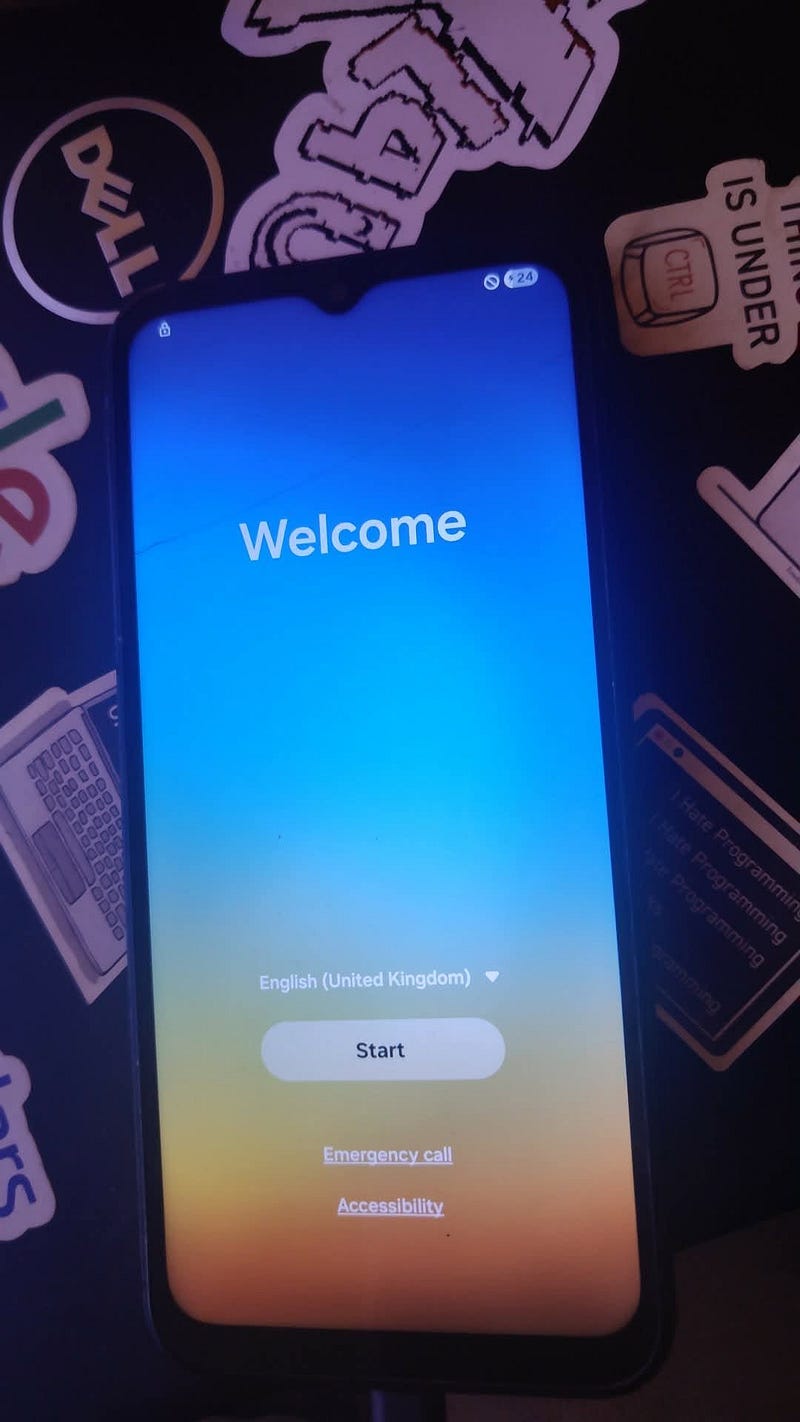
The decryption worked, but FRP wasn’t gone yet. What MOBILedit actually did was get the device into a state where USB Debugging became accessible. That was the real unlock. From here, I could actually talk to the phone.
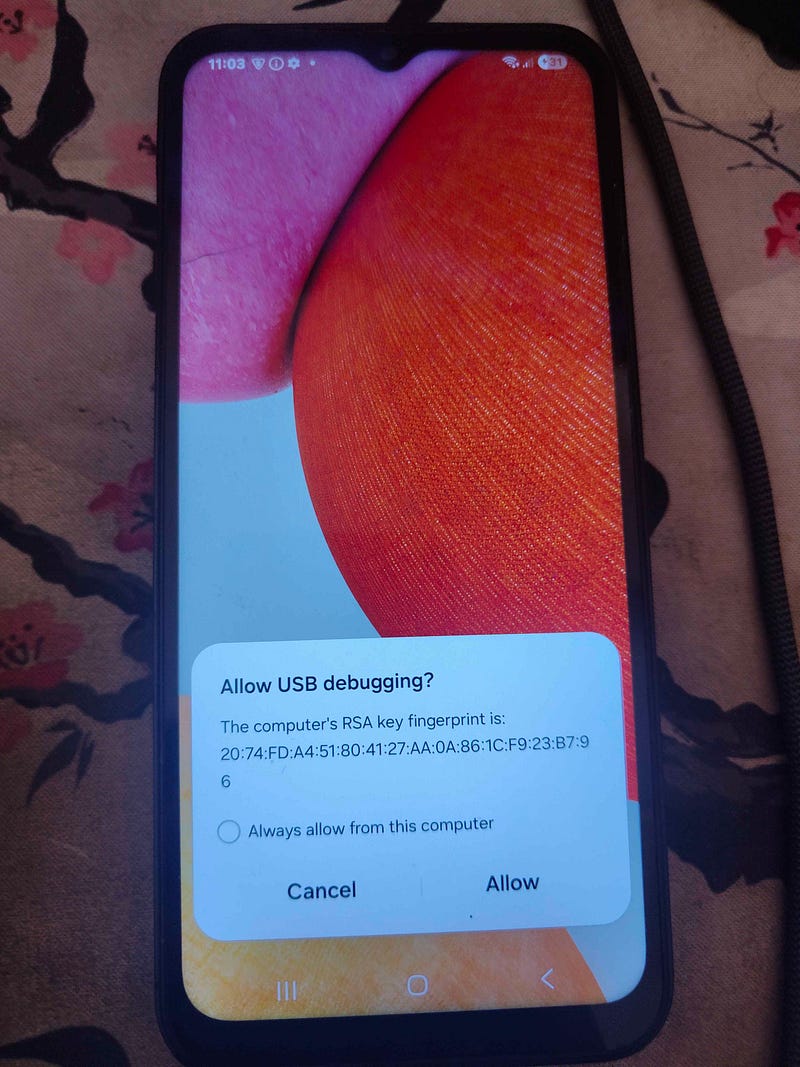
With ADB (Android Debug Bridge) connection established, I moved to Android Utility PRO to handle the FRP removal itself.
Android Utility PRO: Validating the State
The log showed exactly what happened:
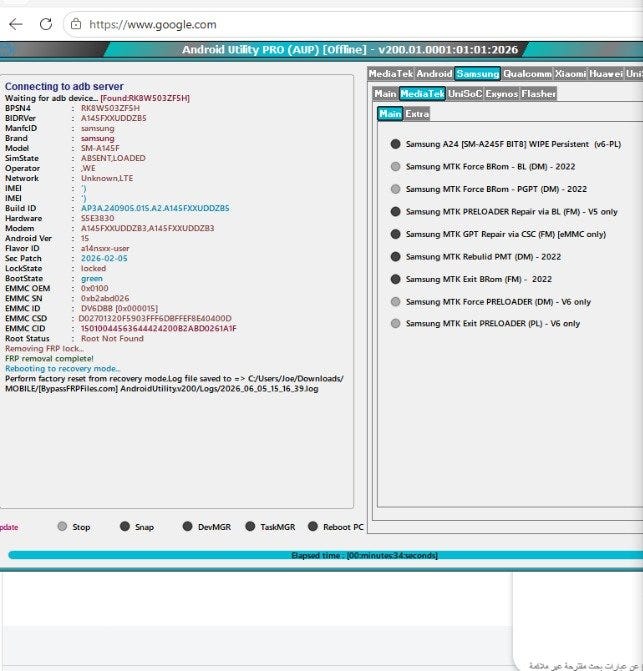
FRP removed. Device rebooted to recovery. Factory reset performed. Done.
Now the phone was fully open, no FRP, no lock. But also no data. The factory reset had wiped everything the original owner had. I needed to find them a different way.
Pivoting to OSINT: The SIM Card as an Identity Anchor
With the phone now in a clean setup state, I walked through the initial Android setup without signing in to any Google account, reached the home screen, and enabled USB Debugging in Developer Options.
ADB was now live. But a freshly wiped device has nothing to carve. The only artifact remaining was the SIM card.
I inserted it and waited for the chance that someone would call. Nobody called.
So I took the number and ran it through two passive lookup tools:
- GetContact, a crowd-sourced contact database built from what other users have saved in their phonebooks
- Truecaller, same concept at a global scale, with a significantly larger dataset
Both returned the same name. Let’s call him Sayed.
The WhatsApp Confirmation
A name from a passive OSINT lookup is a lead, not a confirmation. Numbers get saved under the wrong names. Databases go stale. I needed verification before reaching out.
Here’s where the SIM card becomes more than just a phone number.
WhatsApp ties accounts to SIM numbers. If I install WhatsApp on the device using the inserted SIM, it authenticates against WhatsApp’s servers using that number and loads the account history, contacts, chat inbox, everything. The data lives on the server, not on the device. A factory reset doesn’t touch it.
Using the SamFw Tool’s App Manager to push the APK via ADB:
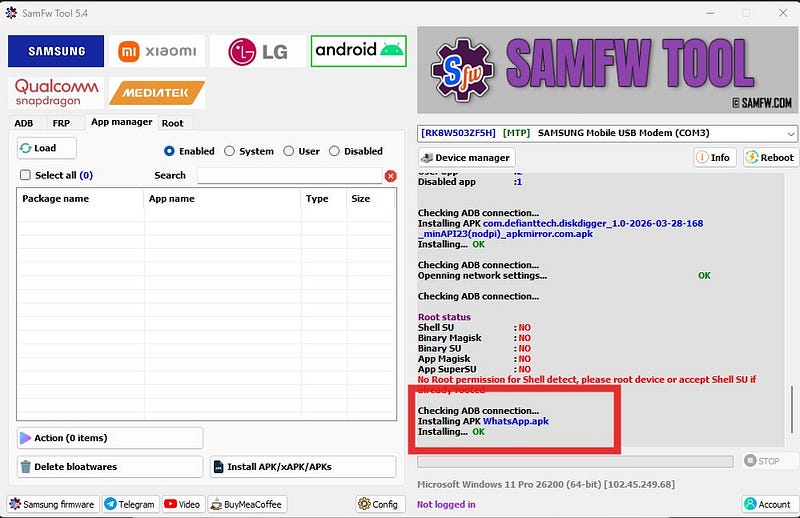
WhatsApp was registered, the account was loaded, and the inbox was opened.
The first contact name that appeared: Sayed.
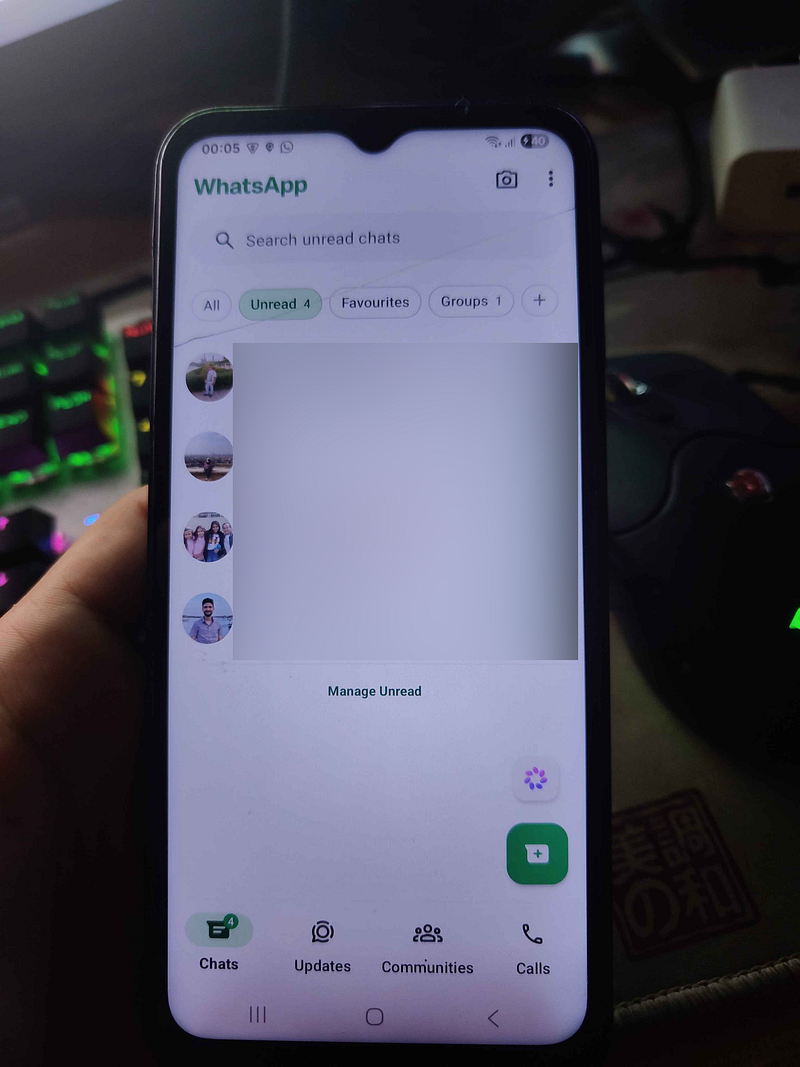
The passive OSINT lookup matched what WhatsApp’s own server-side data knew about that number’s social network. Cross-confirmed. Same person.
I sent a message explaining the situation. Got a reply within minutes. Arranged the handoff. Phone returned.
What This Case Actually Demonstrates
Mobile Forensics
- Understanding when ADB access is and isn’t possible based on device state
- Factory reset + data carving as a standard fallback when live access is blocked
- FRP is a critical post-reset blocker that changes the entire extraction path
- Download Mode as a hardware information source independent of the Android OS
Chipset Research
- Identical model numbers can carry completely different silicon depending on the region/batch.
- Forensic tooling, especially partition-level decryption, is chipset-specific, not model-specific
- Verifying hardware before selecting a toolchain is not optional; it’s a required step.
DFIR Tooling
- SamFw Tool: FRP status verification, ADB-based APK delivery
- MOBILedit Forensic Ultra: Exynos-specific boot recovery and partition decryption
- Android Utility PRO: Post-bypass device state validation
Passive OSINT
- SIM number as a persistent identity anchor that survives a device wipe
- GetContact and Truecaller for crowd-sourced number-to-identity attribution
- WhatsApp account recovery as a server-side identity cross-reference
- Understanding that app-layer identity data lives on the SIM + server, not on device storage
The Key Lesson
The single decision that unlocked this entire case was confirming the chipset before committing to a toolchain.
Every bypass method, every forensic tool, every community guide you find online makes implicit assumptions about the hardware it’s targeting. If you don’t verify those assumptions first, you can spend hours on techniques that were never going to work on your device, not because you did them wrong, but because they were never written for your hardware.
The model number is not enough. Check the chipset. Then pick your tools.